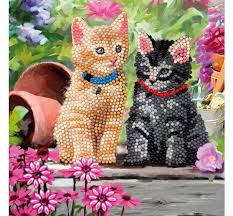
When you hear "painting of a diamond," you might first think of a jeweler examining a precious stone under a loupe. However, in the craft world, this term takes on a different meaning. Diamond painting is a unique blend of cross-stitch and paint-by-numbers, employing specific techniques that anyone can master with a bit of practice. Here’s a detailed look at the techniques used in diamond painting to create sparkling masterpieces.
Select the Right Canvas
Choosing the correct canvas is the first step in diamond painting. Most kits include a pre-printed, adhesive canvas marked with symbols. These canvases range in size from small (20x20 cm) to large (over 100x100 cm). A clear, well-defined canvas ensures ease of placement and ultimately a more beautiful result.
Organize Your Diamonds
Proper organization of the resin diamonds (or drills) is crucial. These tiny gems come in square or round shapes and are usually sorted by color in labeled bags. Many crafters use additional storage containers to avoid mixing colors and to streamline the process. Organizing your diamonds can save significant time during the painting process.
Choose Between Square or Round Diamonds
Selecting the type of diamond affects the final appearance. Square diamonds fit together with no gaps, creating a fuller and more complete look. Round diamonds, on the other hand, are easier to place and often preferred by beginners. The choice depends on your preference for detail and ease of use.
Start Your Project
Begin your project by peeling back a small section of the protective film on the canvas. Work in small sections to prevent the adhesive from collecting dust or drying out. Most crafters recommend starting from the bottom right corner if you are right-handed, and the bottom left if you are left-handed.
Apply the Diamonds
Applying the diamonds requires a special pen tool, which is dipped in wax to pick up the diamonds. The pen allows you to transfer the diamonds from the tray to their corresponding symbols on the canvas. This technique requires a steady hand and a bit of patience to ensure each diamond aligns correctly.
Seal the Diamonds
Once the painting is complete, sealing it enhances its longevity. A sealant, either a spray or brush-on, protects the diamonds from dust and helps keep them firmly in place. It’s a crucial step for preserving the sparkle and attachment of the diamonds.
Display Your Artwork
After completing and sealing your painting, it’s ready to display. Framing is a popular option as it not only protects the painting but also enhances its presentation. You can choose frames that complement the artwork or match your home décor.
Tips for Precision
Use additional tools to improve precision and speed. A diamond painting ruler, which has holes where the diamonds fit, can help achieve straight lines and even patterns, especially useful for large areas of the same color.
Engage in the Community
Learning from the diamond painting community enhances your technique. Joining online forums, social media groups, or local clubs allows you to share tips, seek advice, and display your completed works. This engagement can immensely improve your skills and enjoyment of the hobby.
Mastering the techniques in painting of a diamond brings immense satisfaction and results in stunning visual art. Whether you’re a beginner or an experienced crafter, diamond painting offers a relaxing, creative outlet that produces dazzling outcomes. Dive into this craft and let your artistic flair shine!